Apache Solr
Docksal Configuration
Add the solr service under the services section in .docksal/docksal.yml:
  # Solr
  solr:
    extends:
      file: ${HOME}/.docksal/stacks/services.yml
      service: solr
Apply new configuration with fin project start (fin p start).
Use http://solr.<VIRTUAL_HOST>/solr to access the Solr web UI.
Drupal Configuration
Enable all required by your version of Drupal modules for the Apache Solr search integration.
For Apachesolr module add your Solr server using following server url:
http://solr:8983/solr
For the Search API module use these values:
| Name | Value |
|---|---|
| Protocol | HTTP |
| Host | solr |
| Port | 8983 |
| Solr path | /solr |
| Solr core | collection1 |
Updating Solr Configuration
Say you need to update your schema.xml or other configuration.
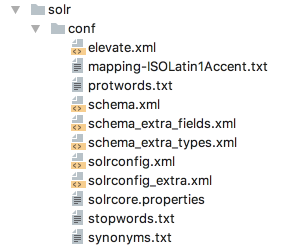
You can put all your custom Solr config files to the .docksal/etc/solr/conf folder:
Then update your .docksal/docksal.yml to mount them in the solr service:
# Solr
solr:
  hostname: solr
  image: ...
  volumes:
    - ${PROJECT_ROOT}/.docksal/etc/solr/conf:/var/lib/solr/conf:ro
Apply configuration changes with fin project start (fin p start).
Versions
Run fin image registry docksal/solr to get a list of available image tags.
fin image registry docksal/solr
docksal/sorl:1.0-solr3 (deprecated)
docksal/sorl:1.0-solr4 (deprecated)
docksal/solr:5.5-2.0
docksal/solr:6.6-2.0
docksal/solr:7.5-2.0
Legend:
<image-repo>:<software-version>[-<image-stability-tag>][-<flavor>]
Multiple Solr Cores
To run multiple Solr cores, follow version specific instructions below.
Solr 4
To set up multiple Solr cores for use with the Drupal Search API Solr module,
modify your .docksal/docksal.yml or .docksal/docksal-local.yml file with the following:
services:
  solr:
    extends:
      file: ${HOME}/.docksal/stacks/services.yml
      service: solr
    labels:
      io.docksal.virtual-host: solr-a.${VIRTUAL_HOST},solr-b.${VIRTUAL_HOST}
    volumes:
      - ${PROJECT_ROOT}/.docksal/etc/solr/a:/opt/solr/example/solr/a:ro
      - /var/lib/solr/a/data:rw
      - ${PROJECT_ROOT}/.docksal/etc/solr/b:/opt/solr/example/solr/b:ro
      - /var/lib/solr/b/data:rw
Create the file .docksal/etc/solr/a/core.properties for instance a with the contents:
name=a
dataDir=/var/lib/solr/a/data
Create the file .docksal/etc/solr/b/core.properties for instance b with the contents:
name=b
dataDir=/var/lib/solr/b/data
Solr 6
Docksal current has Solr 4 defined in the Docksal images. For users with a need to use Solr 6.x, you can set this in
your docksal.yml file.
  solr:
    volumes:
      - ${PROJECT_ROOT}/.docksal/etc/solr/a:/opt/solr/server/solr/a:ro
      - ${PROJECT_ROOT}/../data/a/solr:/var/solr/a/data:rw
      - ${PROJECT_ROOT}/.docksal/etc/solr/b:/opt/solr/server/solr/b:ro
      - ${PROJECT_ROOT}/../data/b/solr:/var/solr/b/data:rw
    image: solr:6.6-alpine
Create the file .docksal/etc/solr/a/core.properties for instance a with the contents:
dataDir=/var/solr/a/data
Create the file .docksal/etc/solr/b/core.properties for instance b with the contents:
dataDir=/var/solr/b/data
The files in .docksal/etc/solr/a/conf and .docksal/etc/solr/b/conf will also need to be updated too. If you are upgrading from another version of solr, then I suggest that you delete the contents of the data directory and re-index.